
 By Miles Sinclair
DIY animated Christmas decorations let you add motion to your holiday display without buying a fully assembled prop. In this guide you will learn how to plan a simple moving piece, choose a motor and controller, wire the power safely, and mount the finished decoration so it survives weather and daily use. Most beginner projects can be built in an afternoon with basic hand tools and a few inexpensive electronic parts.
What Counts as an Animated Christmas Decoration?
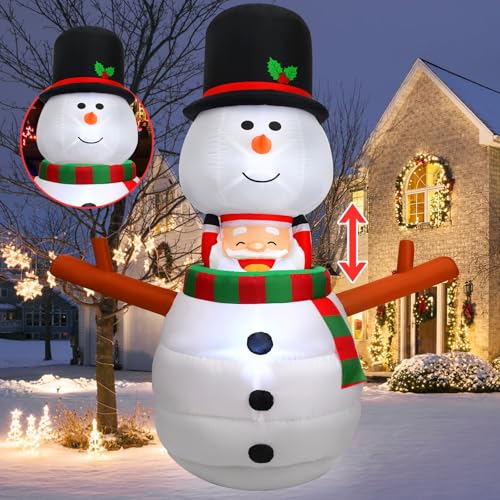
An animated decoration is any display element that moves, changes, or responds on a timer or trigger. The most common DIY versions include rotating stars, swinging figures, waving arms on a snowman, spinning wreaths, and light sequences that chase along a frame. Some builders combine motion with programmable LEDs so the movement and the lights run together as one show.
Before you start, decide which category your project falls into. A purely mechanical piece, like a rotating platform driven by a small motor, is easier to build and troubleshoot than a project that mixes mechanics with addressable lighting.
Step 1: Plan the Motion and the Look
Start with a sketch. Note the size of the finished piece, the type of motion you want, and where it will sit. A piece that will be viewed from 20 feet away needs bolder shapes and slower movement than one meant to be seen up close on a table.
Choose a motion type
- Continuous rotation: A motor turns a shaft at a steady speed. Good for spinning stars, wreaths, or umbrellas.
- Back-and-forth swing: A crank or linkage converts rotation into a swing. Good for ornaments, bells, or hanging figures.
- Lift or extend: A linear actuator or lever raises an arm or head. Good for waving characters.
- Light chase: Lights turn on in sequence along a path. Often easier than mechanical motion and uses no moving parts.
Set a realistic speed
Slow motion reads better from a distance and is quieter. For most outdoor displays, one full rotation every 10 to 30 seconds looks natural. Faster movement tends to look mechanical and can draw attention to wobble or noise.
Step 2: Gather Materials and Tools
Most projects use the same core parts. Build a list before you buy anything so you can match voltage, torque, and weatherproofing to your design.
- A low-voltage DC or AC-to-DC motor, sized for the load (check the rated torque in the manufacturer’s specifications)
- A timer, relay, or microcontroller to switch the motor on and off
- A weatherproof power supply rated for outdoor use
- Wood, acrylic, or foam board for the moving piece and frame
- Bearings or a bushing for the rotating shaft
- Outdoor-rated wire, connectors, and a weatherproof enclosure
- Screws, brackets, and a drill with bits
- Multimeter, wire strippers, and heat-shrink tubing
Step 3: Build the Mechanical Assembly
Build and test the moving part before you add decoration. A rotating disk, a bell crank, or a lift arm should move freely by hand before you connect it to a motor.
Mount the motor securely
Use a bracket or a plywood base sized to the motor body. Motors that vibrate will loosen screws over time, so add a lock washer or a drop of threadlocker to fasteners. Keep the motor shaft aligned with the load to avoid side loads that wear bearings quickly.
Add a bearing or bushing
A rotating piece that rests directly on wood will bind after a few hours of use. Use a sealed bearing or a brass bushing at the pivot point. Check that the moving piece has at least 1/8 inch of clearance from fixed parts so it does not rub.
Balance the load
An unbalanced piece strains the motor and creates a noticeable wobble. Mount the decoration so its center of mass sits directly over the shaft. If the piece is heavier on one side, add counterweight to the opposite side.
Step 4: Wire the Power Safely
Electrical safety matters more than the mechanical design. Follow the manufacturer’s instructions for every component and never run unrated extension cords through outdoor displays.
- Use a power supply and enclosure rated for outdoor or wet locations.
- Plug the system into a GFCI-protected outlet, or use a GFCI adapter.
- Keep all connections inside a sealed box with gaskets, and use waterproof connectors where wires leave the box.
- Route cords so water drips away from connections, not toward them.
- Use a fuse or circuit breaker sized to the power supply’s rating.
If you are unsure about wiring mains voltage, consult a licensed electrician before installing anything permanent.
Step 5: Add Lights and Control Logic
Once the motion works, layer in lighting. Simple projects can use a standard LED string on a fixed timer. More advanced builds use a microcontroller that coordinates a motor with addressable LEDs, so the lights pulse in time with the movement.
Choose a control method
| Control method | Best for | Skill level |
|---|---|---|
| Mechanical timer | Simple on/off cycles | Beginner |
| Relay with a smart plug | Scheduling from a phone app | Beginner |
| Microcontroller (such as an Arduino or ESP32) | Custom sequences synced with lights | Intermediate |
| Dedicated light controller with motor output | Show-style synchronized displays | Intermediate |
For a first project, a relay or smart plug is the least complicated option. Move to a microcontroller once you are comfortable with wiring and code.
Step 6: Mount and Test Outdoors
Test the complete system indoors for at least an hour before placing it outside. Watch for overheating motors, loose wires, and sticking parts. Then mount the decoration in its final position, secure it against wind, and run it for a full day before relying on it.
Check connections and moving parts every few days during the season. Cold temperatures can make lubricants thicken, and wet weather can loosen fasteners.
Common Mistakes to Avoid
- Skipping the balance check: An off-center piece will strain the motor and fail early.
- Using indoor-rated parts outside: Moisture gets into connectors and motors within days.
- Overloading the motor: Heavy decorations need a motor with higher torque, not a faster one.
- Forgetting wind load: Large flat pieces act like sails. Anchor them firmly.
- Running the motor continuously: Use a timer so the motor rests between cycles.
- Ignoring noise: Rattling brackets and squeaky bearings are easy to fix before the display goes up.
Tips for Better Results
- Build a prototype from cardboard or foam board first to test proportions.
- Paint moving parts with outdoor-rated paint and seal wood with exterior finish.
- Label every wire and keep a simple wiring diagram for future repairs.
- Start with one moving element. Add more once the first one runs reliably.
- Photograph the build so you can recreate or repair it next year.
Recommended gear
A few supplies make DIY projects more reliable and easier to maintain.
- Weatherproof power supply: A supply rated for outdoor use keeps moisture away from the electronics. View on Amazon
- Sealed bearings: Sealed units resist dust and water, which extends the life of rotating parts. View on Amazon
- Smart plug with scheduling: A simple way to run motors and lights on a timer from a phone. View on Amazon
FAQ
What is the easiest DIY animated Christmas decoration to build?
A light chase along a frame or a simple rotating star driven by a small motor and a timer are the easiest starting points. Both need few parts and little wiring.
Do I need programming skills?
No. Mechanical builds and relay-based controls need no code. Programming becomes useful only when you want lights and motion to follow custom sequences.
What kind of motor should I use?
Choose a motor based on the load it must move. Check the rated torque and speed in the manufacturer’s specifications, and select one with a margin above the expected load.
Can animated decorations stay outside in the rain?
Only if every electrical component is rated for outdoor or wet locations and all connections are sealed. Keep power supplies off the ground and use GFCI protection.
How long do DIY animated decorations last?
Lifespan depends on weather exposure, motor quality and how often the piece runs. Regular inspection, lubrication and tightening of fasteners help a build last several seasons.
How do I keep the motion quiet?
Use bearings instead of bare wood contact, add rubber mounts to reduce vibration, and balance the moving piece carefully.
Are these projects safe for children to help with?
Children can help with painting, cutting foam, and assembling non-electrical parts. Adults should handle all wiring, mains connections and testing.
Conclusion
DIY animated Christmas decorations combine simple mechanics with basic electronics, and most beginners can finish a first piece in a weekend. Plan the motion, build and balance the mechanical part, wire everything with outdoor-rated parts, then test thoroughly before going outside. Start small, and you can add more moving elements each season.
Related reading
- Best Lighted Outdoor Christmas Decorations for 2026
- Best Christmas Porch Decorations for a Festive Entrance in 2026
- What to Put in a Christmas Stocking: Ideas by Age
- What Size Christmas Tree Do I Need? A Simple Measuring Guide
Ready to choose one?
About Miles Sinclair
Miles Sinclair is part of our editorial team and reviews and edits our tech christmas guides, checking product details against manufacturer specifications and owner feedback.








Write Your Review
No reviews yet. Be the first to share your experience!