
 By Miles Sinclair
Learning how to make animated Christmas decorations means you can build a moving display that spins, blinks, waves or sways without paying for a finished commercial prop. In most DIY builds, you combine a simple motor or servo, a lightweight frame, a power source and a controller that sets the timing. This guide walks through the planning, materials, building steps and testing process, so you finish with a reliable decoration that runs on its own through the holiday season.
Decide What Kind of Motion You Want
Before you buy anything, choose the type of movement. The motion determines the motor, the controller and how sturdy the frame needs to be. Most home projects fall into a few categories:
- Rotation: a snowflake, wreath or star that turns slowly on an axis. A small DC gear motor is usually enough.
- Oscillation: a figure that swings back and forth, such as a bell or a hanging ornament. A servo or a crank linkage works well.
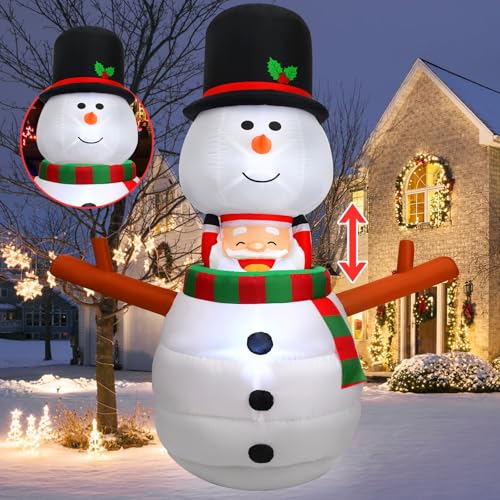
- Lift or drop: a Santa that rises from a chimney or a star that slides along a track. These need a linear actuator or a geared winch.
- Light-only animation: chasing or fading LEDs with no moving parts. This is the easiest build and needs no mechanics at all.
Start with one motion. A single rotating piece is far easier to get right than a scene with four moving parts running on different timers.
Gather the Tools and Materials
Most builds use the same core parts. Having everything on hand before you start prevents mid-project stops.
- A small DC gear motor (commonly 6 to 12 volts) or a hobby servo for oscillating parts
- A microcontroller such as an Arduino or ESP32, or a plug-in timer for simple on-and-off motion
- A motor driver or relay module, since microcontroller pins cannot drive a motor directly
- A regulated power supply matched to the motor voltage, with a safe current rating
- Lightweight material for the moving part: foam board, basswood, PVC sheet or thin plywood
- Hot glue, zip ties, a drill, a hacksaw, wire strippers and a multimeter
- Outdoor-rated enclosures and weatherproof connectors if the display will be outside
Step-by-Step: Building a Basic Rotating Decoration
Step 1: Design the moving part
Sketch the piece on paper at full size. Keep the moving part under about 12 inches across for a small gear motor, since larger loads strain the motor shaft and the gearbox. Cut two identical pieces from foam board or thin plywood so the weight is balanced around the center. An unbalanced piece wobbles and can stall the motor.
Step 2: Mount the motor
Fix the motor to a stable base, such as a plywood plate or a 3D-printed bracket. Attach the moving piece to the motor shaft using a hub or a set screw. Check that the shaft turns freely by hand before you connect power. Friction at this stage causes most early failures.
Step 3: Wire the driver and controller
Connect the microcontroller output to the motor driver input, then wire the driver to the motor and the external power supply. Keep the motor supply separate from the controller’s own power, because motor current spikes can reset small boards. Add a flyback diode across the motor terminals if your driver does not include one.
Step 4: Program the motion
A simple sketch can run the motor forward for a set number of seconds, pause, then reverse. Start slow. A duty cycle of about 40 to 60 percent gives smooth movement on most small motors. Add a random pause or a slight speed change to make the motion look less mechanical.
Step 5: Add lights if you want them
Pair the motion with LED strips or fairy lights controlled by the same board. Use a separate channel or a separate driver for the lights so that a motor stall does not affect the display. Synchronizing light changes to a beat of motion creates the most convincing effect.
Step 6: Test before installing
Run the decoration indoors for at least several hours before mounting it outside. Watch for overheating at the motor and driver, uneven movement and loose connections. Check temperatures by touch carefully, since motors can get warm quickly.
Simple Light-Only Animation
If you want an animated look without moving parts, a light-only build is the best starting point. Use an addressable LED strip and a controller with preset chase, fade and sparkle patterns. The setup is the same as a moving build, minus the motor and frame. Many owners layer light animation over a still decoration, which gives a sense of motion at very low risk.
Power and Safety Considerations
Electrical safety matters more when a decoration runs outdoors. Consult a qualified electrician for any permanent wiring, and check local codes for outdoor fixtures.
| Component | What to check |
|---|---|
| Power supply | Output voltage matches the motor; current rating has headroom |
| Enclosure | Rated for outdoor use and sealed at cable entry points |
| Wiring | Gauge sized for the current; connectors protected from rain |
| Motor load | Moving part is balanced and light enough for the motor |
| Grounding | Metal frames bonded and protected by a GFCI-protected outlet |
Always unplug or disconnect power before adjusting moving parts. Keep fingers clear of gears and pinch points.
Common Mistakes
- Powering a motor directly from a microcontroller pin, which can damage the board.
- Using an unbalanced moving piece that strains the motor and shortens its life.
- Sharing one power supply between motor and lights without checking total current.
- Skipping weatherproofing, which leads to corrosion and short circuits after the first rain.
- Running the motor continuously for days without rest intervals, causing overheating.
- Hanging a heavy animated piece from a light bracket that bends in the wind.
Tips for Longer-Lasting Displays
- Use plastic or nylon gears where possible; they run quieter and are less prone to rust.
- Lubricate gear shafts with a light grease rated for low temperatures.
- Program a daily off time so motors rest overnight and the display lasts longer.
- Label every cable and connector so you can troubleshoot quickly next year.
- Store the moving parts indoors between seasons to protect them from moisture and temperature swings.
Recommended gear
A few widely available items make builds easier. Choose parts rated for your motor voltage and your environment.
- Arduino Uno R3 starter kit: a well-documented microcontroller board with plenty of tutorials for timing and motor control. View on Amazon
- ESP32 development board: adds Wi-Fi control, which is useful for scheduling displays from a phone. View on Amazon
- L298N motor driver module: a common driver for small DC motors that handles direction and speed control. View on Amazon
- Addressable LED strip (WS2812B): pixel-level control for chasing and sparkle effects that pair well with motion. View on Amazon
FAQ
What is the easiest animated Christmas decoration to make?
A light-only animation using an addressable LED strip and a preset controller is the simplest. It needs no motor, no mechanical design and little wiring, so beginners can finish it in an afternoon.
Do I need programming skills?
Not for basic motion. Many controllers offer built-in patterns or simple block-based programming. Writing your own timing code takes more effort, but example sketches for common boards are widely available.
What voltage should the motor use?
Match the motor to its driver and power supply. Small Christmas motors often run between 6 and 12 volts. Check the motor’s rated voltage and never exceed it.
Can I leave an animated decoration running outdoors all season?
Yes, if it is weatherproofed, uses rated connectors and runs on a GFCI-protected outlet. Schedule rest periods so the motor does not run constantly, and check the enclosure after storms.
Why does my motor stall or hum without turning?
The most common causes are an unbalanced load, insufficient power, or a driver set to too low a duty cycle. Reduce the load, check the supply voltage and confirm the driver is wired correctly.
How do I keep the motion from looking mechanical?
Add small random pauses, vary the speed slightly and sync light changes to the movement. These touches make the display feel more natural.
Is it safe to build animated decorations with kids?
Kids can help with design, painting and light-only builds. Keep them away from wiring, power supplies and moving gears, and supervise any cutting or soldering.
Where can I learn more about setting up holiday displays?
Once your animated piece is running, you may want to plan the surrounding scene. The guide on How to Set Up a Christmas Village Display covers layout and placement, and How to Hang Christmas Lights on Your House Safely explains safe installation for outdoor fixtures.
Conclusion
Making animated Christmas decorations comes down to choosing one motion, balancing the moving part, controlling power carefully and testing before you mount anything outside. Start with a single rotating piece or a light-only effect, then expand as you gain confidence. With a weatherproof build and a sensible schedule, your display can run reliably throughout the season.
Related reading
- Best Lighted Outdoor Christmas Decorations for 2026
- Best Christmas Porch Decorations for a Festive Entrance in 2026
Ready to choose one?
About Miles Sinclair
Miles Sinclair is part of our editorial team and reviews and edits our tech christmas guides, checking product details against manufacturer specifications and owner feedback.







Write Your Review
No reviews yet. Be the first to share your experience!