
 By Miles Sinclair
Updated November 2026
A replacement motor for animated Christmas decorations can bring a stalled spinner, rocking reindeer or waving Santa back to life without buying a whole new figure. In this guide you will learn how to diagnose a failed motor, measure and match the right replacement, swap it out safely and test the result. The process usually takes an hour or two with basic tools, though the exact steps depend on how the display is built.
Confirm the Motor Is Actually the Problem
Before you order anything, rule out the simpler causes. Many animated decorations stop moving because of a power issue, a worn gear or a jammed linkage, not a dead motor.
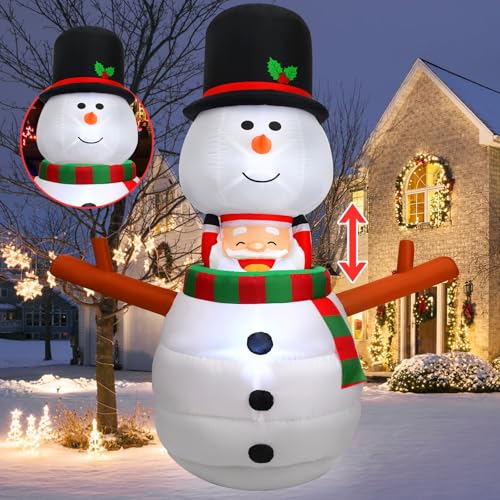
Shopping for one? See our guide: 6 Best Christmas Animated Outdoor Decorations for Every Yard in 2026.
- Check the power source first. Test the outlet, the timer or controller, and the power adapter. Many decorations use a 12V DC or 6V DC adapter, and a failed adapter can look exactly like a failed motor.
- Listen when the unit is powered. A healthy motor usually produces a steady hum. Silence points to a power or wiring fault. A buzzing or clicking sound with no movement often means the motor is receiving power but cannot turn, which suggests a jam or stripped gear.
- Turn the output shaft by hand with the power off. It should rotate smoothly with some resistance. If it will not turn at all, the gearbox or linkage is jammed. If it spins freely but nothing moves, the gear connection may be broken.
- Inspect for a burning smell, discolored wiring or melted plastic around the motor housing. These signs mean the motor has overheated and should be replaced, not just cleaned.
Identify the Motor Type and Specifications
Animated decorations use a few common motor types, and a replacement must match on the points that affect how the display moves. Match the operating voltage, the rotational speed and the shaft or mounting style at minimum.
Read the Existing Motor Label
Remove the motor carefully and look for a printed label. It often lists voltage (for example 6V DC or 12V AC), current draw, and sometimes RPM. If the label is worn, measure instead.
Measure the Shaft and Mounting
Use calipers or a ruler to record the shaft diameter, shaft length, and the bolt spacing or mounting bracket dimensions. Many replacement motors use a D-shaft, which has a flat side. Confirm whether your old shaft is round, D-shaped or has a keyed slot, because a round shaft will not seat in a D-shaft gear.
| Specification | What to Check | Why It Matters |
|---|---|---|
| Voltage (V) | Match exactly, AC or DC | Wrong voltage can burn out the motor or run it too weakly |
| Speed (RPM) | Close to the original | Affects how fast figures move and how the timing looks |
| Shaft type | Round, D-shaft or keyed | Determines whether the gear or arm will fit |
| Shaft diameter and length | Measure in millimeters or inches | Must seat in the existing gear without slipping |
| Mounting bolt pattern | Hole spacing and size | Allows the motor to sit in the original housing |
| Rotation direction | Clockwise or reversible | Matters for linkages that move in one direction |
Consider the Decoration Type
A spinning tree topper needs a steady, continuous rotation, while a rocking figure may use a crank or cam that moves back and forth. Note how the motor connects to the figure, because a gear reduction box, a belt or a direct drive each call for a different replacement. If you are unsure, photograph the internal mechanism before disassembly.
Gather the Tools and Parts You Need
Having everything ready keeps the repair short and reduces the chance of damaging the decoration’s plastic housing.
- Small Phillips and flathead screwdrivers
- Needle-nose pliers and wire strippers
- A multimeter for checking voltage and continuity
- Calipers or a metric ruler
- Electrical tape or heat-shrink tubing
- Replacement motor matched to your specs
- Light machine oil or dry lubricant for the gears
- Zip ties and a small container for screws
Step-by-Step Replacement Process
Step 1: Unplug and Document
Disconnect all power. Take photos of the wiring and the gear arrangement from several angles. Label the wires if the colors are not obvious.
Step 2: Open the Housing
Remove the screws holding the housing or base plate. Some decorations use snap-fit clips, which can crack if pried too hard. Work slowly and use a plastic pry tool if you have one.
Step 3: Disconnect the Old Motor
Note which wire goes to which terminal. Unscrew or unsolder the connections, then remove the mounting bolts. Keep the original gear and linkage intact unless they are damaged.
Step 4: Transfer the Gear or Coupling
If the existing gear is press-fit onto the old shaft, a gear puller may be needed. Many owners instead buy a replacement motor with a matching shaft or use a set-screw coupler to join the new shaft to the old gear. A coupler is often the simpler option, provided it does not add play.
Step 5: Mount and Wire the New Motor
Seat the new motor in the same position, align the shaft with the gear, and tighten the mounting bolts just enough to hold it. Connect the wires to match the original polarity. For DC motors, reversed polarity may make the motor run backward or not at all.
Step 6: Test Before Closing
Power the unit briefly and watch the movement. Check for smooth rotation, unusual noise and any warmth from the motor. Then turn the unit off and check that the wiring is clear of moving parts.
Step 7: Reassemble and Secure
Route the cables away from gears and linkages, secure them with zip ties, and close the housing. Fit all screws without overtightening, since plastic threads strip easily.
Common Mistakes to Avoid
- Ignoring the voltage. Installing a motor rated for a different voltage is the most frequent cause of a second failure.
- Forcing a shaft into a gear. A mismatched D-shaft or round shaft can crack the gear or the motor bearing.
- Skipping the power check. Replacing a motor when the adapter has failed wastes time and money.
- Overlubricating. Excess oil can drip onto the wiring or attract dust into the gears. A small amount is enough.
- Using a motor with too much torque or speed. A faster motor can make figures move jerkily or strain the linkage.
- Leaving the housing open outdoors. Moisture can short the motor. Reseal the housing and use weatherproof connectors if the decoration is used outside.
Tips for a Longer-Lasting Repair
- Clean out dust, leaves and old lubricant from the gearbox before installing the new motor.
- Store the decoration indoors or in a dry bin between seasons to slow gear wear.
- Use a surge protector or timer with a stable output to reduce electrical stress on the motor.
- Keep a note of the motor’s specifications in the housing or on your phone for future repairs.
- Let the motor run for a few minutes on the first day after installation, then check it again to confirm it is not heating up.
Recommended gear
A basic multimeter lets you check the adapter and motor before buying a replacement, which can save you from ordering the wrong part. View on Amazon
Calipers give you accurate shaft and bolt-pattern measurements, which is the most reliable way to match a replacement motor. View on Amazon
A small set of precision screwdrivers helps you open plastic housings without stripping the small screws used in most decorations. View on Amazon
FAQ
Can I use any motor with the same voltage?
Matching voltage is necessary but not sufficient. Shaft type, diameter, speed and mounting pattern also need to match, or the motor will not fit or will run the display incorrectly.
How do I know if the problem is the motor or the adapter?
Measure the adapter’s output with a multimeter while it is connected to the decoration. If the voltage is correct and the motor still does not turn, the motor or its wiring is more likely at fault.
Is it worth replacing the motor instead of the whole decoration?
For larger or higher-quality figures, a motor swap is often the more practical choice, especially if the body and lights still work. For small, inexpensive units, replacing the whole piece may be simpler.
Why does my replacement motor run too fast?
The speed rating may be higher than the original, or the new motor may lack the original gear reduction. Check the RPM rating and consider a motor with a matching gearbox.
Can I repair an overheated motor?
In most cases an overheated motor should be replaced. Overheating often damages the windings or insulation, and repairing them at home is rarely reliable.
Do I need to solder the new motor wires?
Not always. Many replacement motors come with screw terminals or pre-attached leads. If you do solder, use heat-shrink tubing for insulation and avoid leaving bare wire exposed.
Is it safe to repair electrical decorations myself?
Low-voltage decorations are generally safe to repair with basic care, but unplug everything first and avoid working on mains-powered wiring unless you are qualified. If you are unsure about any electrical step, consult a qualified electrician or repair technician.
Where can I read reviews of replacement motors before I buy?
Start with the Replacement Motor for Animated Christmas Decorations Review (2026) for a closer look at specific options and how they fit different decoration types.
Conclusion
A replacement motor for animated Christmas decorations is often the fastest way to restore a favorite display. Diagnose the problem first, record the exact specifications, and match voltage, shaft and mounting before you buy. With careful installation and a test run before closing the housing, the decoration can move reliably for many more seasons.
Related reading
- Vintage Animated Christmas Decorations: 5 Best Picks for Retro Holiday Displays
- Top 7 Animated Christmas Deer Decorations for Yards and Porches (2026)
- Large Animated Christmas Decorations: 6 Best Picks for Yards (2026)
- How to Make Animated Outdoor Christmas Decorations: A Practical Guide (2026)
- How to Make Animated Christmas Decorations: A Step-by-Step Guide for Beginners
Ready to choose one?
About Miles Sinclair
Miles Sinclair is part of our editorial team and reviews and edits our tech christmas guides, checking product details against manufacturer specifications and owner feedback.







Write Your Review
No reviews yet. Be the first to share your experience!